Teaching Collections grade 6 made easy? How can you make this rigorous textbook more comprehensible for ALL your students?
Do you remember the moment when you cracked open the shiny new textbook, you breathed in the fresh ink, but as you took a closer look, you knew you’d need more student-friendly activities to help you teach the material?
You knew your students would struggle with comprehending this rigorous textbook. This was expected, but…
How are you going to be able to help them when you are already overwhelmed by the stress of EVERYTHING that has to be done? And now!
Creating materials for a required text takes a lot of time.
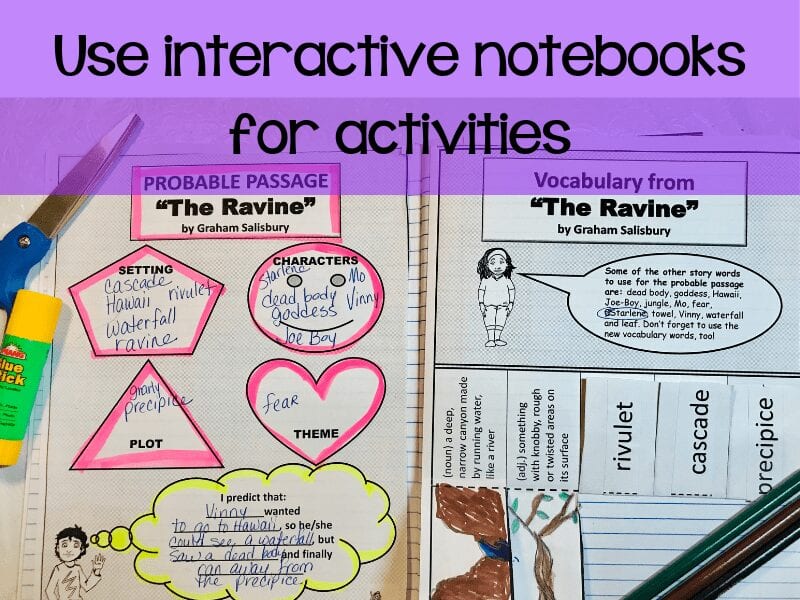
Writing diverse and usable Collections grade 6 activities takes a lot of time. For example, “The Ravine,” took me 2 weeks to create. But I knew my SPED and ESL students would struggle with the textbook. So, I decided to create interactive notebook resources for them. For a free sample of these, click here.
After creating interactive notebook materials for every story in Collections grade 6, I know how to teach this textbook. Now all of my students can comprehend it. This process took me over two years to complete because, just like you, I teach full time in the classroom.
And I want to share with you what I’ve learned. After reading this blog post, you will be ready to start teaching Collections grade 6 more easily.

Get familiar with the online resources
Get familiar with what Collections grade 6 offers in its online textbook. The online version of the textbook and the myhrw site offers a lot of tools. A LOT of tools. So many tools that, unless you’ve had weeks of training with it, you’ll find it overwhelming. I know I did.
However, there are a few bits and pieces that I found very useful, so I will share those with you.
Make teaching easier with the audio button in Collections
In the online version of the textbook, you can have the computer read a selection aloud. Click on the audio button, which should be on the left side menu, and the page will be read aloud.
This will save your teaching voice, so you don’t end up losing it within the first couple of weeks of teaching!
Students who need added support can also read more independently by using the audio book feature.
Level Up Tutorials
Another feature that I love about teaching with the online Collections grade 6 textbook is the Level Up Tutorials. They are self-guided, interactive lessons that students can complete independently.
If you have students write down their answers to the Level-Up Activities, you can hold them accountable. I use a simple two-column note with summary worksheet. When I choose to grade these, I use a rubric for main ideas and details.
While students are working on Level Ups, you can teach small groups and conference with one-on-one with students. While students are learning with an engaging tool, you are free to help other students. It’s a win-win situation!
Focus on 2 standards per selection when teaching Collections grade 6
Choose 2 standards (Common Core or your state standards) to focus upon for each selection. I learned this the hard way. My first year of teaching Collections grade 6, I tried to introduce all the 6th grade literature standards for “The Ravine.” My students were so sick of the story I learned never to do that again.
If you’re at the beginning of the school year, making inferences and citing text evidence is a great place to start. Students will use this standard all year long, so it’s imperative that you start here. I used “The Ravine” to introduce this.
You can come back to revisit this standard as needed throughout the school year, but they really need you to explicitly teach it first. This is the standard my students struggled with the most at the beginning of the year.
Use interactive notebooks to make teaching Collections grade 6 easier
I use interactive notebooks for all student work, except for the assignments they submit on their electronic devices. So, all tests and writing assignments (that I want to assess) are completed online. However, everything else is in the notebook.
An interactive notebook does not have to be something with a lot of coloring, cutting and foldables. I don’t even use glue. I use tape instead. (Yes, I go through tons of tape, but that’s what I have my school or department pay for instead of pencils, which are more affordable for me).
Do I have students color things? Sometimes.
Do I have them create foldables? Sometimes.
Do I have them cutting stuff? Rarely.
I do all the cutting, and if I want something to be colorful, I use colored paper. I don’t use it very often though because AstroBrights is expensive.
There are 3 reasons why I use interactive notebooks to make teaching Collections grade 6 easier:
- Kids stay more organized.
- Notebooks are easy to grade.
- Provides a comprehensive story of student work that is useful at all conferences.
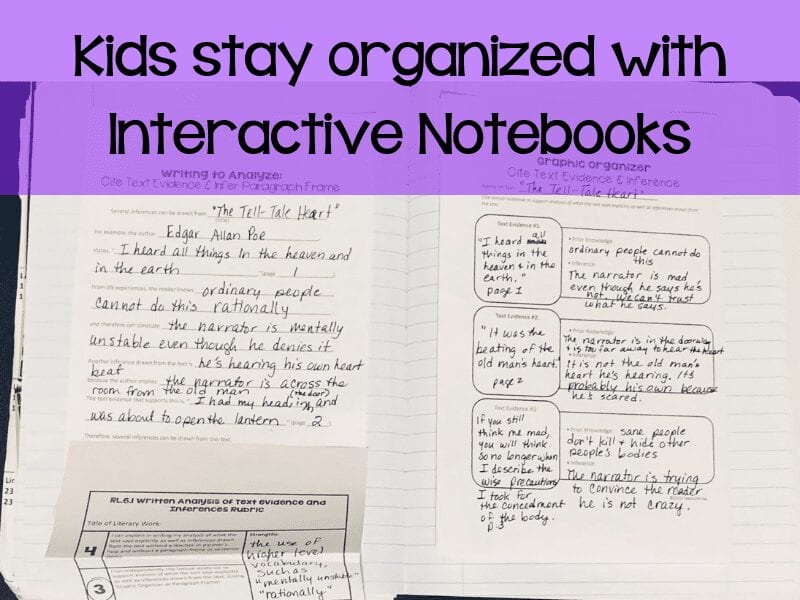
1. Interactive notebooks make it easy for kids to stay organized
- No more crumpled pages in the bottom of the backpack
- All work is in chronological order.
- Students and teacher can revisit previous notes and assignments
2. Easy to grade
- Grade as you go – please don’t take crates of notebooks home! I did this, and I rarely graded them.
- Choose what page(s) you want to assess in depth.
- Use a simple, standards-focused rubric.
- Circulate and grade for completion as they are working or during a one-on-one student conference.
- You can use a clipboard with the students names preprinted on a piece of paper and then I write the score on it. At the end of the day, enter in all the grades.
- Have students electronically submit the page you want to assess.
- You do not have to grade everything! That’s impossible.
3. Provides a comprehensive story of student work
- Students can refer back to previous rubrics before a new writing assignment. (You must direct them to do this because they will forget about it)
- Students can use notes they have written or handouts given earlier in the quarter or semester to help them with writing about or discussing a text.
- Teachers and parents can refer to the interactive notebook at conferences.
How I set up interactive notebook pages to work with my Collections Grade 6 activities
For each selection, I usually have:
- quick write
- vocabulary notes
- level up notes
- graphic organizers for reading
- standards-focused writing activities
- rubric
- revisions of writing activities
These are about 8-10 pages in their notebooks, depending on how many notes or handouts I give for the standards.
My students use 2 composition books per year, one for each semester. We use both the front and back pages, too. I don’t always give student handouts for students to complete for writing or notes.
Sometimes my students copy a graphic organizer from the projector and fill it out. Or I write a question on the board, which they write down and answer. This saves time, paper and copy counts.
My students don’t keep a table of contents in the interactive notebooks. We never keep with it, and it wastes too many pages at the beginning of their notebooks. I do keep a list of pages that belong in their interactive notebooks on the whiteboard or on a sticky note for students to refer to if absent.
Other helpful hints about interactive notebooks
I make all my copies of all the Collections interactive notebook resources I want students to have for one selection. Usually, I reduce them so that I copy 2 to a page. Then, I cut those in half. It saves paper and time.
Then, I give students lots of time to tape those resources into their notebooks all at one time. This saves your daily time in getting started and saves tape, since it doesn’t have to be on student desks all the time. I only put out the tape when I give out the selection activities.
Interactive notebooks save me tons of time, and I’ve used them for years. However, a great alternative to using paper is to go digital and have students keep an interactive notebook in Google Slides™.

Engage your students in the topic of the text selection through Quick Writes
Students need the opportunity to write about their thoughts about a topic before they begin learning or discussing. This helps them to know their own thoughts on a topic before others influence their thinking. It also gives them the opportunity to revise their thinking later.
Once students have their resources, you can have them do a quick write on the topic or theme from the selection. This will serve to engage them in conversation and get them primed for the story or article they will be reading.
A quick write is when students write for 5-10 minutes about an assigned or chosen topic. For example, for “The Ravine,” I have students write about a time they experienced peer pressure.
By having students write about these topics, they can relate better to the characters and learn empathy. They might also see themselves in the various characters that they read about in your class. For me, I grade quick writes as a participation grade or I have students choose 1 they want me to grade.
There are two ways I share quick writes. I write quick writes with my students, so I can model first draft writing. So, I share these out with the whole class, and then I have students share their own in pairs. Sometimes students volunteer to share to the whole class.
Another way to share quick writes is with Flip Grid. If students have their own devices, they can quickly record themselves on Flip Grid and share it with the class via the Flip Grid interface. Then, they can listen to each others’ Flip Grid recordings and give positive feedback. (I am not affiliated with Flip Grid at all. It’s a free program that I’ve heard about and would like to give it a try in my classroom.)
Another way to engage your students is to play word games with them.
Teach Vocabulary in Collections grade 6
Vocabulary instruction can be a lot of fun, and students need to learn as much vocabulary as they can. I usually teach both the academic vocabulary of the standards as well as the vocabulary from the story or selection. There are so many ways to teach vocabulary. You can read my blog post on Word Games here.
Vocabulary instruction is when my classroom is at its most liveliest and interactive. I do have to remind students the rules, but it’s so worth it.
Students score much higher on vocabulary quizzes than they do when I hadn’t used vocabulary games and activities. Repeated practice helps students to retain this knowledge level information. If you see students getting bored with one activity, then switch to a more challenging one. Get students using the words in their writing and discussion of texts.
Reading and discussion activities for Collections Grade 6
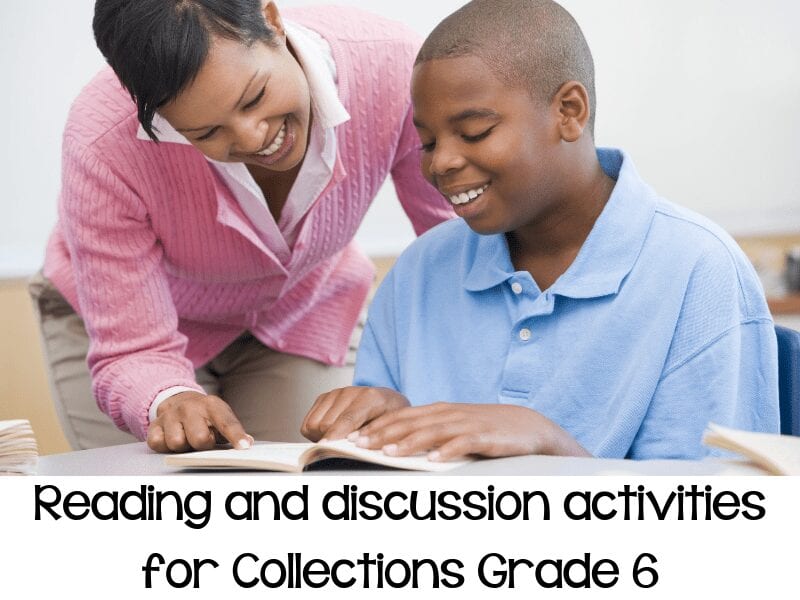
Now you have primed the students for reading and discussion of the text. As I’ve mentioned above, you can use the audio version in the online textbook to help students read more independently.
Usually my advanced students read independently without the audio, but I tell them about it, just in case.
By listening to the story or article a page at a time, you can stop and discuss the characters and plot or the main ideas or arguments presented. This gives you the opportunity to check for understanding. I often use the guiding questions in the Teacher Resources tab of Collections Grade 6 online textbook for this.
Once students have read the text, I use the collaborative discussion questions at the end of the selection. It’s great practice for students to voice their opinions and citing text evidence.

Focus on the first standard – writing activity
Next, students should reread the story through the lens of the first focus standard with a portion of the text. For example, if you are reading, “The Ravine,” students would reread the story and write down their inferences as well as the text evidence that supports those inferences.
After taking these notes, students should write a paragraph in which they explain one of their inferences. Here are some sentence stems you could use to help students to write this:
Introductory sentence: An inference that can be made from “The Ravine” is…
- Text evidence sentence: The author hints at this by saying, “…” (author’s last name, page).
- Analytical sentence: From prior knowledge, I know…
- Furthering the analysis sentence: This inference is important to make because…
- Concluding sentence: Therefore, my inference is…
Don’t worry about students using the words “I” or “my” for 6th grade analysis. They will learn other ways to express their thoughts as they grow older. It is the content and the analysis that is most important for them to learn here.
However, if it really bugs you, you can have students use the phrase “the reader” instead of the word “I.” Once students are comfortable with analytical writing, I introduce this substitution and tell them why we don’t refer to ourselves in academically advanced writing.
If you feel students need more practice with the standard, you can have them write another paragraph about another inference they made in the text.
Focus on second standard – writing activity
For the second standard, you basically repeat what you did with the first standard. So, I will summarize down below this paragraph. You can copy and paste this into your lesson plans and tweak if you want.
Students will:
- Read the entire text and discuss.
- Reread lines of the text that will best pair with the standard
- Take notes on that part of the text for the standard
- Write a paragraph showing text evidence and explaining the importance of it to the text and question.
- Revise for clarity and completeness.

Grade (almost) everything using rubrics for the Collections Grade 6 activities
Out of all the time-saving tips I can give you as a seasoned teacher, this is probably one of the best.
However, please don’t use an overly complicated rubric. You’ll drive yourself crazy trying to check off all the parts.
I grade for the focus standard, and a few extra things that I am looking for like capitalization and punctuation. It will be easier for you to grade 130+ student assignments, and a short rubric will be easier for students to understand.
Another pointer I can give you is to grade as you go.
If you use interactive notebooks, while students are doing level ups, writing or working on some other independent activity, grade the previous activity. Hold one-on-one conferences with students.
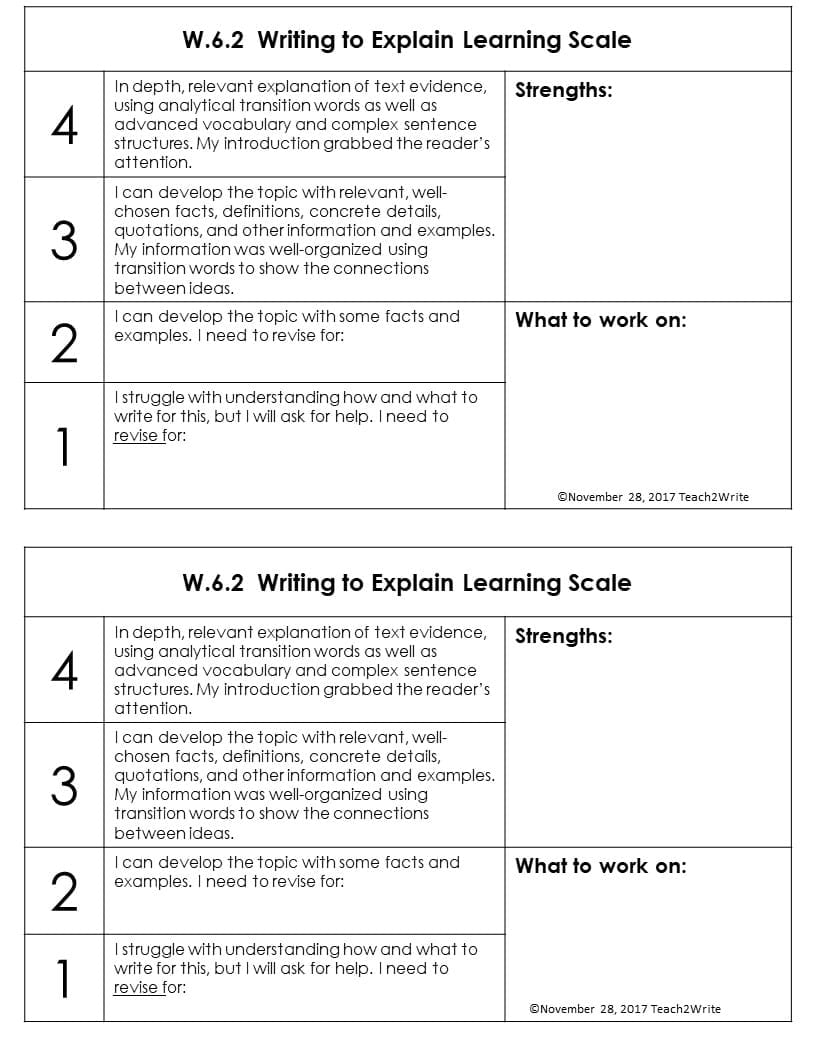
On a rubric pre-printed, you can just circle the score and underline any specific tips for students. If you have the time to sit down with the student (which I don’t do until after the second or third time we practice that particular focus standard), then you can write down some notes for them to refer back to for their next paragraph.
Of course, you will need to remind them to refer to that rubric when they do write again.
I did say almost everything can be graded with a rubric.
However, for quizzes, I create online quizzes through Canvas for my students. So, the computer grades these. My quizzes are specifically created for my students, so I don’t share those with other teachers because I’m always revising my quizzes.
We might have to revisit something that students missed on a previous quiz. I also throw out questions that too many students miss, and then I have to reword to assess. I only quiz for vocabulary and knowledge level concepts. You can find a lot of this in the online textbook, too.
Here’s an example of a rubric from my resource for Collection 3 “Mammoth Shakes:”
Save Loads of Time Right Now
Although, I have given you everything that I do to teach the Collections grade 6 textbook, along with a ton of time-saving tips, I would like to save you even more time.
If you would like to your students to try out a couple of the interactive notebook resources for free, “The Ravine” and “The Jumping Tree,” click here here. These include everything I described above, including the rubrics.


